Introduction
In this blog post, you will learn to set up Oracle Apex locally on your own Windows PC with Oracle rest data services under Oracle database 21c Express Edition. This installation will deploy Oracle rest data services on the Apache Tomcat server. Following are the five software that we will be installing in this blog.
Download Oracle Database 21c Express Edition
First, Using this Download Oracle XE 21c link you will be taken to the site from where you can download Oracle Database 21c Express Edition. As you can see in the below screenshot, Use the Windows link to download the Windows version.
Download Oracle APEX
Next, Use this Download Oracle APEX link to download the latest version of Oracle Apex.
Download Oracle Rest Data Services
Click this link to download the latest version of ords.
Download JAVA
Download Apache Tomcat
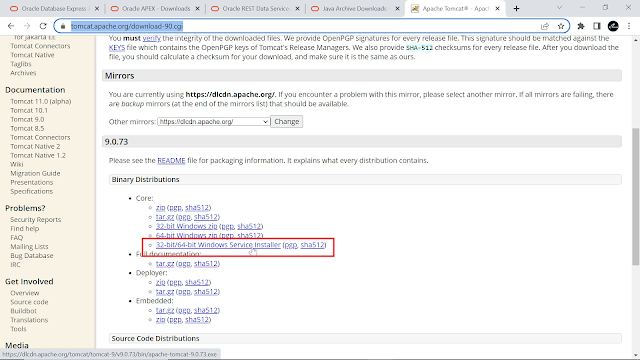
Finally, download Apache Tomcat using the Windows service installer link.
Install Oracle Database
Execute these steps to first install the Oracle database.2. Copy the downloaded database zip file to this new folder and extract the zip file.
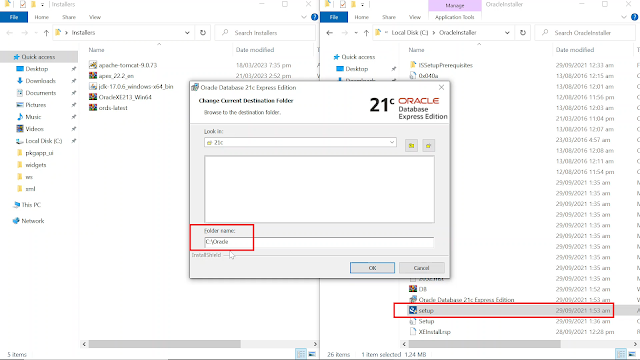
3. Now launch the setup exe file to install the database and specify a new folder for the database installation. I created the Oracle folder under my C: drive as illustrated in the screenshot below.
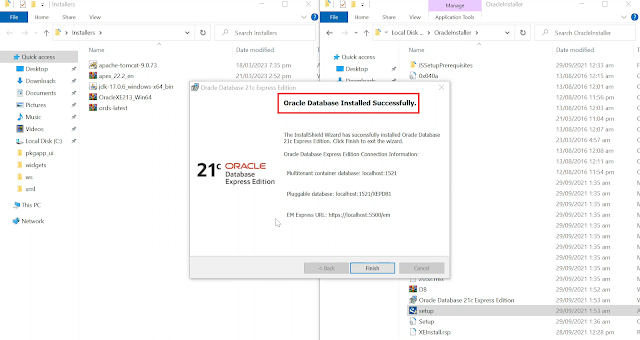
The database has been installed successfully.
Install Oracle APEX
Now let's move on to install Oracle Apex.
1. Create a new folder named Apex, and copy the downloaded Apex software into this new folder. Extract the zip file.
2. The Apex subfolder contains the software that we are going to install next. After extracting the zip file, open a command prompt as an administrator.
3. Switch to the extracted Apex software folder, then connect to the database.
4. Get the list of pluggable databases.
Alter the session to use the xepdb1 as the container.
Then execute the three commands to start the Apex installation process. The SQL script file (apexins.sql) provides complete access to the app builder environment to develop applications.
The process must end with this completion message.
5. Now run the highlighted script (apxchpwd.sql). Running this change password SQL script enables you to create or update your instance administrator account. This script requires that your container is set to xepdb1 which we have already set before running the first script. If you logged out before running the script, then re-execute the set container command. If you do not run the set command, then you might encounter login issues when you try to access Oracle Apex.
6. Configure RESTFUL services by running the following script. Once configured, the instance administrator can control the availability of the feature.
Install JAVA
7. Now install Java Development Kit by invoking the downloaded .exe file.
Install Oracle REST DATA Services
Next, install Oracle REST Data Services, which was formerly known as the Apex listener. It allows Apex applications to be deployed without the use of an Oracle HTTP server and mod PL/SQL, or the embedded PL SQL Gateway.
8. Create a directory (C:\App\ords) for the ORDS software.
9. Copy the downloaded zip file to the ords folder and extract the zip file.
10. Open a command prompt as an administrator. Connect the database as sysdba. Unlock common Public Accounts including sys. Also, alter the session to set the container to xepdb1. Ignore the errors if you encounter them.
11. Create a config directory under the App folder. Then create the ords sub-directory under the config directory. Finally, create a logs sub-directory under the ords sub-directory, as illustrated in the following figure.
12. You need to create the following script file named ords.bat to install ords. Make sure that the DB_SERVICE matches the name of your database.
---------------------------------------------------------------------------- Ords.bat ---------------------------------------------------------------------------- set ORDS_HOME=c:\app\ords set ORDS_CONFIG=c:\app\config\ords set ORDS_LOGS=%ORDS_CONFIG%\logs set DB_HOSTNAME=localhost set DB_PORT=1521 set DB_SERVICE=XEPDB1 set SYSDBA_USER=SYS c:\app\ords\bin\ords.exe ^ --config %ORDS_CONFIG% install ^ --log-folder %ORDS_LOGS% ^ --admin-user %SYSDBA_USER% ^ --db-hostname %DB_HOSTNAME% ^ --db-port %DB_PORT% ^ --db-servicename %DB_SERVICE% ^ --feature-db-api true ^ --feature-rest-enabled-sql true ^ --feature-sdw true ^ --gateway-mode proxied ^ --gateway-user APEX_PUBLIC_USER ^ --proxy-user ------------------------------------------------------------------------------
13. Open a command prompt. Run the ords.bat batch file from its location.
14. Add the ords bin directory to your path permanently and in the current session using these set commands.
Install Apache Tomcat
15. Finally, install Apache Tomcat using the downloaded executable file. Set the port to 8888 and set administrator login credentials (User Name = admin and Password = Manager_2023)
16. Open a command prompt as an administrator, create an "i" directory under the webapps folder.
This is the "i" directory we just created.
17. Copy all files and folders from the APEX images folder, and paste them into the "i" directory.
18. Copy C;\App\ords\ords.war file to C:\Program Files\Apache Software Foundation\Tomcat 9.0\webapps directory.
19. Run the tomcat9w.exe file to include a reference to the -Dconfig.url flag to tell the ords where to find the ords configuration. Stop and start Tomcat using its icon in the system tray.
20. All is set now access the Oracle Apex admin page using this URL.
Run Oracle APEX and create your first workspace
21. Create a workspace. After creating the new workspace, Sign Out.
Log In to the new Workspace
22. Log into the new workspace. You will be prompted to change the password for the admin.
And here is your workspace homepage.


